
Spider Molasses Cookies

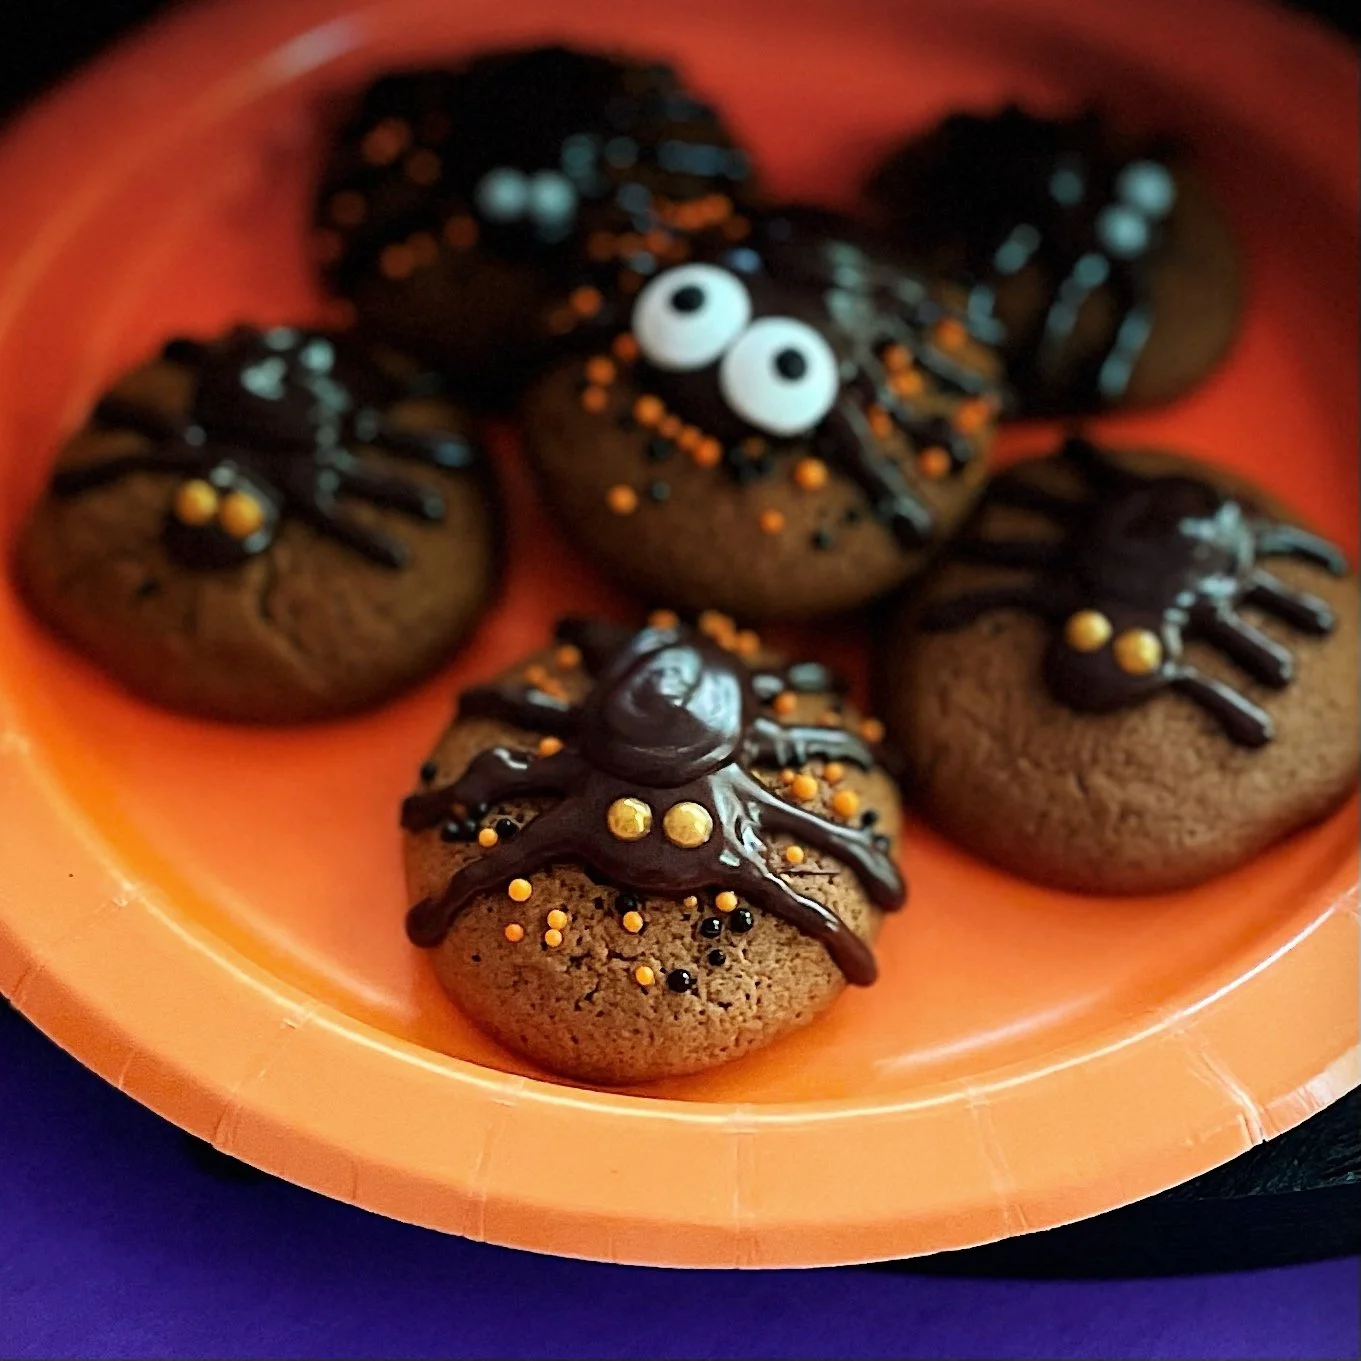
Spooky Spider Cookies
The inspiration for these Spider Molasses Cookies came from my terrifying fear of spiders and all things creepy crawly. Halloween is all about being frightened and facing your fears, right?!? So, I thought I would turn my fear into a delicious and much “less scary” treat to gobble up!
Most people put chocolate on a peanut butter cookie, but with two family members not fond of peanut butter and a LOT more kids with peanut allergies, I decided to change it up a little and use a molasses cookie for a unique combination that gives you hints of a toffee taste. These cookies are also a great accompaniment with tea or coffee that adults will also enjoy. This recipe makes 6 dozen 2-inch cookies. (I halved the recipe while taking photos, so the photos might seem a little scarce or different from when you make this.)
Let’s begin!
Ingredients:

For cookies:
-
6 tbsp plant butter, softened
-
1/2 cup molasses
-
1/2 cup dark brown sugar
-
1 cup coconut evaporated milk
-
3 cups all-purpose flour
-
1/4 tsp salt
-
1 tsp ground ginger
-
2 tsp baking soda
-
1 1/2 tsp vanilla extract
Decorations:
-
1 cup milk or dark chocolate chips
-
Candy eyes
-
Halloween sprinkles
-
Gold or white edible pearls (optional)
How to make spider molasses cookies for Halloween
Instructions:
Preheat oven to 375 ℉ / 190℃ and place a sheet of parchment paper on a baking sheet.

Mix together butter, molasses, and sugar until smooth.

Stir in evaporated coconut milk, then sift in dry ingredients, (flour, salt, ginger, and baking soda)

Add vanilla extract and mix until a smooth, semi-stiff dough is formed.
Scoop dough into a large plastic baggie, then chill for 5 minutes.

Snip corner of baggie (about an inch opening) and pipe dough onto prepared baking sheet, about a two inch sized circle.
They will look a little like big Hershey kisses. You’ll want to mash down the middle to even out a little. You can use a couple of clean fingers or the bottom of a greased glass. See below.


If you want to use the Halloween colored sprinkles on some of them, sprinkle on cookies before baking.
Bake for 8-10 minutes and remove from oven and place on a cooling rack for 2 minutes.

Transfer your cookies to a waxed paper lined cooling rack to continue to cool completely.
In the meantime, get out your decorations and melt your chocolate, according to the instructions on package. (seems like each one is different!)
How to decorate spider cookies

Cool chocolate for 4-5 minutes, then transfer to a zip lock or piping bag and snip the corner or end, to make a very small opening.

Pipe out an oval shape on top center of cookie, this will be the spider body. If you would like, you can pipe one large circle (for body) and one small circle (for head.)
Then pipe out 8 tiny legs, from body, off the sides of cookie. (Kind of like the spider is hugging the cookie!)

Add candy eyes or edible pearls for eyes, then let chocolate cool and set completely before serving or storing.
I like to leave some plain also.

If using for a Halloween party, don’t forget to place a few fake spiders on the table to set the spooky scene.
Also a fun idea, have a bucket full of fun spider rings for guests to have.


Enjoy!
💜Julie
Spider Molasses Cookies
Ingredients
- 6 tbsp plant butter softened
- 1/2 cup molasses
- 1/2 cup dark brown sugar
- 1 cup coconut evaporated milk
- 3 cups all-purpose flour
- 1/4 tsp salt
- 1 tsp ground ginger
- 2 tsp baking soda
- 1 1/2 tsp vanilla extract
- 1 cup milk or dark chocolate chips
- Candy eyes
- Halloween sprinkles
- Gold or white edible pearls optional
Disclaimer:
Nutritional Information is provided as a courtesy only and should be viewed as an estimate. Ingredients can vary with brands and size and Inspiration Apron makes no guarantees to the accuracy of this information.
Instructions
- Preheat oven to 375 ℉ / 190℃ and place a sheet of parchment paper on a baking sheet.
- Mix together butter, molasses, and sugar until smooth.
- Stir in evaporated coconut milk, then sift in dry ingredients, (flour, salt, ginger, and baking soda)
- Add vanilla extract and mix until a smooth, semi-stiff dough is formed.
- Scoop dough into a large plastic baggie, then chill for 5 minutes.
- Snip corner of baggie (about an inch opening) and pipe dough onto prepared baking sheet, about a two inch sized circle, at least 2 inches apart.
- They will look a little like big Hershey kisses. You’ll want to mash down the middle to even out a little. You can use a couple of clean fingers or the bottom of a greased glass.
- If you want to use the Halloween colored sprinkles on some of them, sprinkle on cookies before baking.
- Bake for 8-10 minutes and remove from oven and place on a cooling rack for 2 minutes.
- Transfer your cookies to a waxed paper lined cooling rack to continue to cool completely.
- In the meantime, get out your decorations and melt your chocolate, according to the instructions on package.
- Cool chocolate for 4-5 minutes, then transfer to a zip lock or piping bag and snip the corner or end, to make a very small opening.
- Pipe out an oval shape on top center of cookie, this will be the spider body. If you would like, you can pipe one large circle (for body) and one small circle (for head.)
- Then pipe out 8 tiny legs, from body, off the sides of cookie.
- Add candy eyes or edible pearls for eyes, then let chocolate cool and set completely before serving or storing.

Spider Molasses Cookies
Ingredients
Instructions
- Preheat oven to 375 ℉ / 190℃ and place a sheet of parchment paper on a baking sheet.
- Mix together butter, molasses, and sugar until smooth.
- Stir in evaporated coconut milk, then sift in dry ingredients, (flour, salt, ginger, and baking soda)
- Add vanilla extract and mix until a smooth, semi-stiff dough is formed.
- Scoop dough into a large plastic baggie, then chill for 5 minutes.
- Snip corner of baggie (about an inch opening) and pipe dough onto prepared baking sheet, about a two inch sized circle, at least 2 inches apart.
- They will look a little like big Hershey kisses. You’ll want to mash down the middle to even out a little. You can use a couple of clean fingers or the bottom of a greased glass.
- If you want to use the Halloween colored sprinkles on some of them, sprinkle on cookies before baking.
- Bake for 8-10 minutes and remove from oven and place on a cooling rack for 2 minutes.
- Transfer your cookies to a waxed paper lined cooling rack to continue to cool completely.
- In the meantime, get out your decorations and melt your chocolate, according to the instructions on package.
- Cool chocolate for 4-5 minutes, then transfer to a zip lock or piping bag and snip the corner or end, to make a very small opening.
- Pipe out an oval shape on top center of cookie, this will be the spider body. If you would like, you can pipe one large circle (for body) and one small circle (for head.)
- Then pipe out 8 tiny legs, from body, off the sides of cookie.
- Add candy eyes or edible pearls for eyes, then let chocolate cool and set completely before serving or storing.
Notes
Dairy free and peanut free recipe.

I love molasses cookies and these were the best tasting I have ever had…….I like them just plain anytime of the day.
Thanks so much! I agree, plain is the best way to enjoy, especially with some hot coffee of tea. Glad you liked:)