
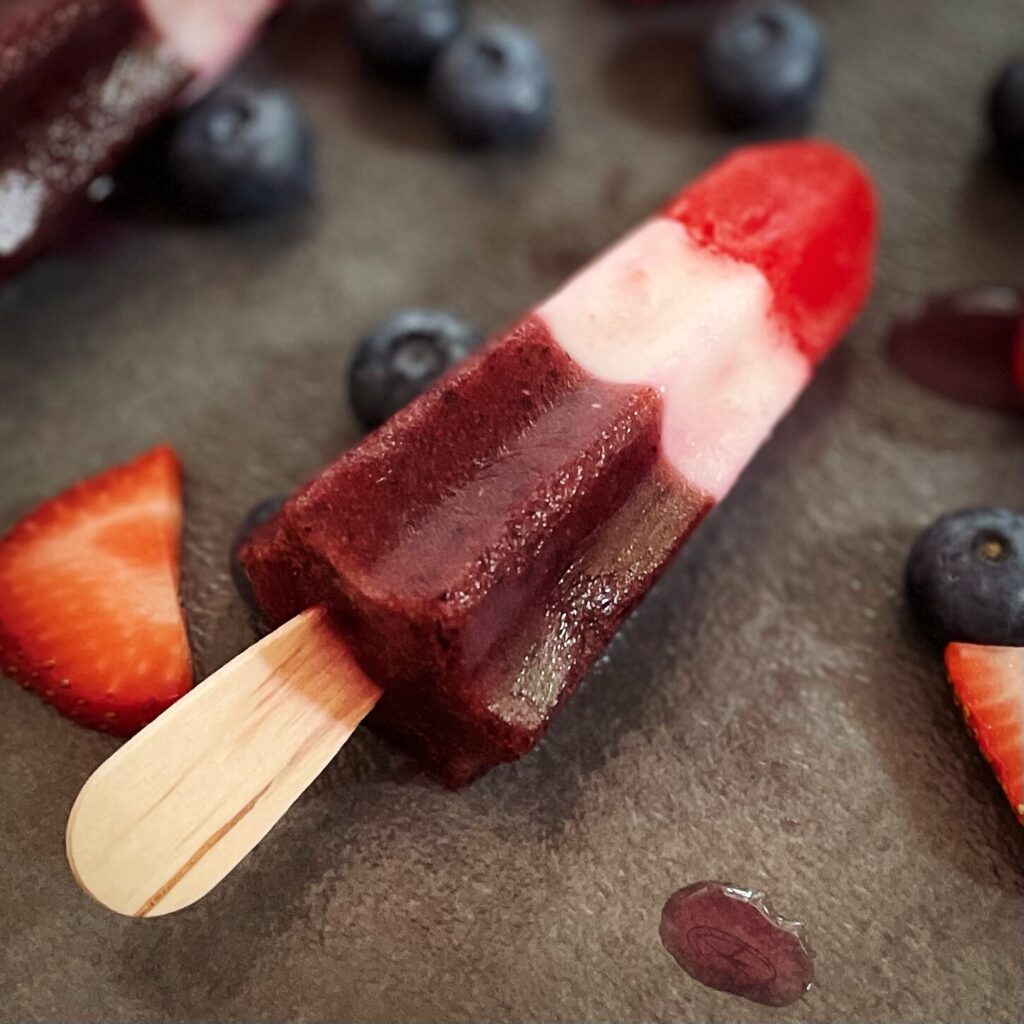
Rocket Pops
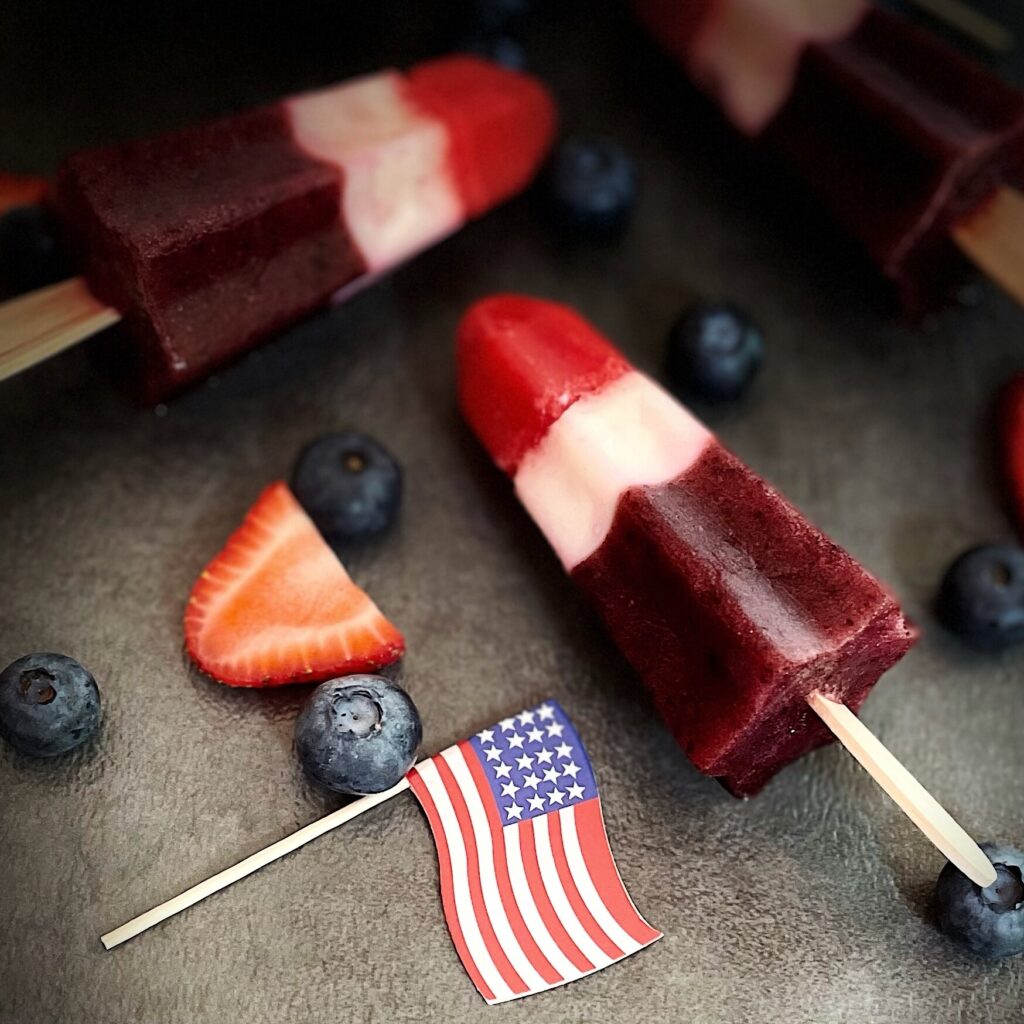
Cool everyone down at your 4th of July cookout, or any day, with these red, white and blue patriotic Rocket Pops. A “healthier” popsicle version of a childhood favorite made with strawberries, blueberries, yogurt and sugar-free sports drink. Cool and refreshing with nourishing fruits and yogurt, along with hydrating sports drink to replenish electrolytes from the hot outdoors fun. These summertime frozen treats are gluten-free, dairy-free and vegan making them an allergy friendly and safe frozen snack to give your kids or guests.
Let’s Begin!
Ingredients:
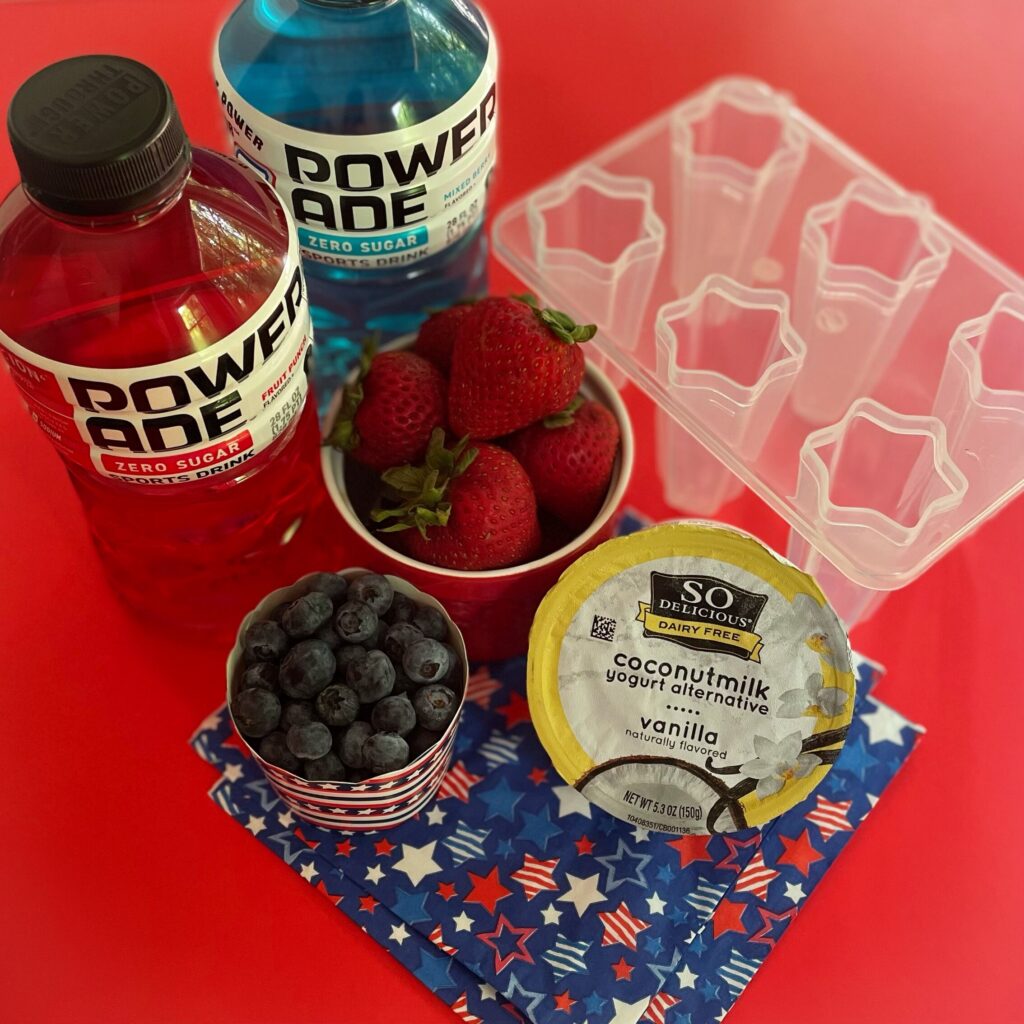
For the red:
- 1 scant cup chopped strawberries
- 1 cup red sugar-free sports drink (I used Fruit Punch flavor)
For the white:
- Vanilla yogurt, (I used a dairy-free coconut milk alternative)
For the blue:
- 1 scant cup blueberries
- 1 cup blue sugar-free sports drink (I used Mixed Berry flavor)
NOTE: You will also need a blender or smoothie maker, popsicle mold and sticks (I used wooden bowtie sticks, they were the perfect size for my mold.) Depending on the size of your popsicle molds, you may have leftover ingredients. I poured my leftovers in a different mold to enjoy later…or taste test before! The measurements of the fruits do not have to be exact, you may use less or more.
Instructions:
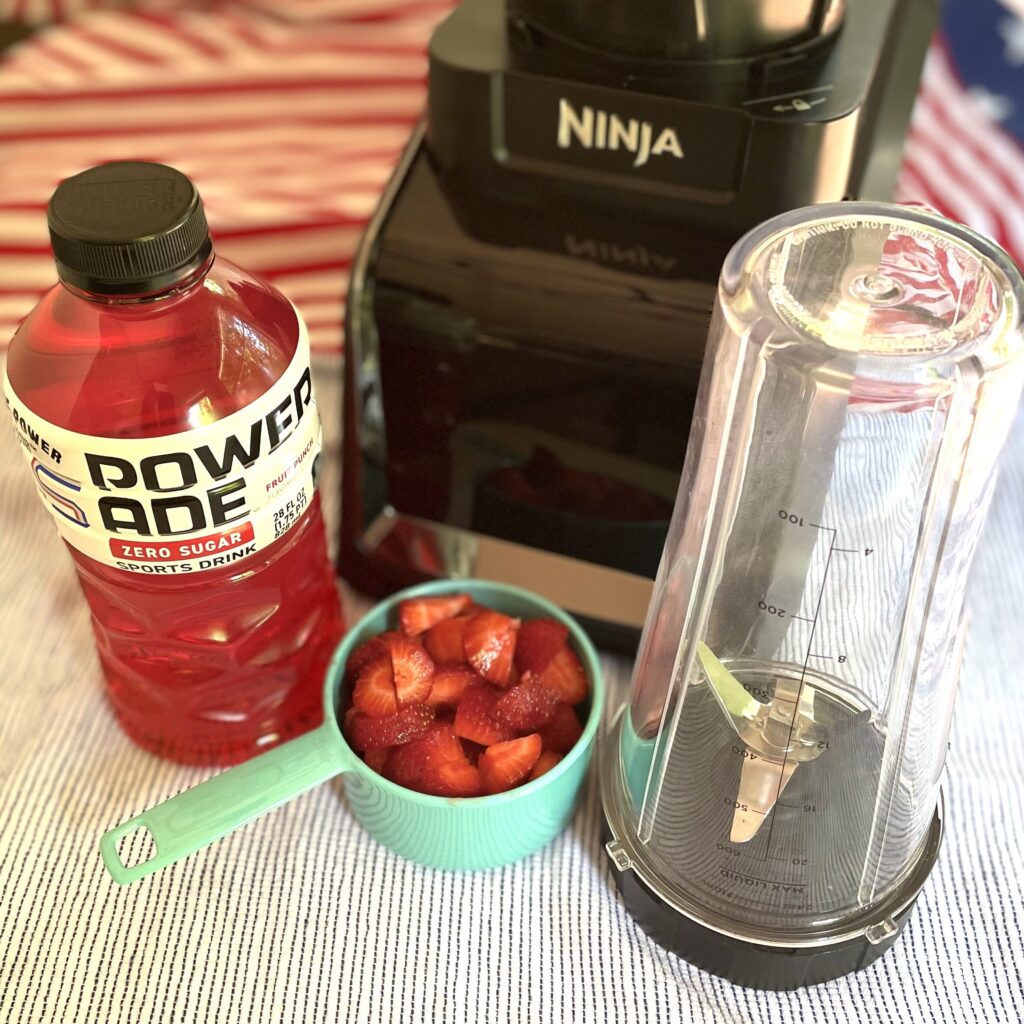
Gather your red ingredients together and add to your smoothie or blender cup and blend until pureed into a nice smooth juice, about 1 minute.
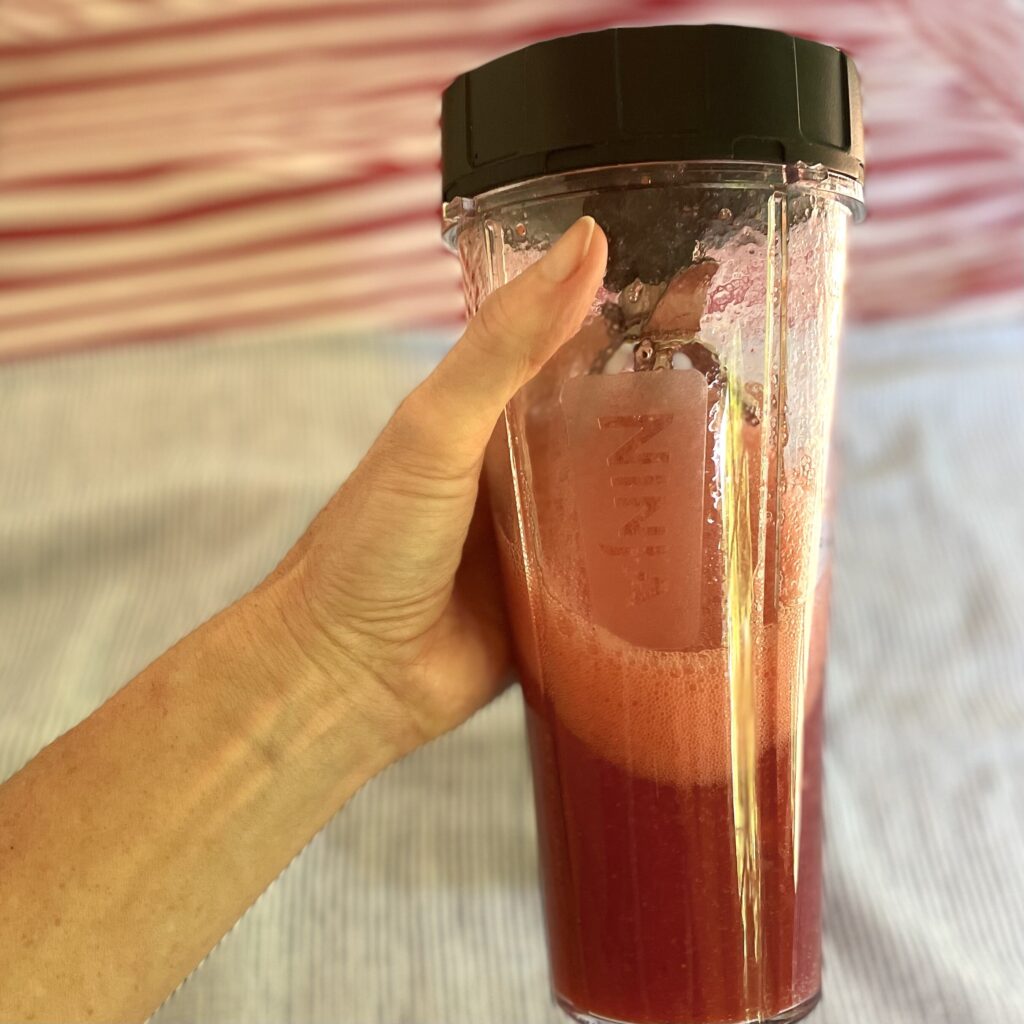
NOTE: As you can see in this photo, there was a lot of foam bubbles from the blending process. Try to let settle or scoop this out before pouring in the molds. This will prevent gaps during the freezing process and give you a more smooth transition between layers.
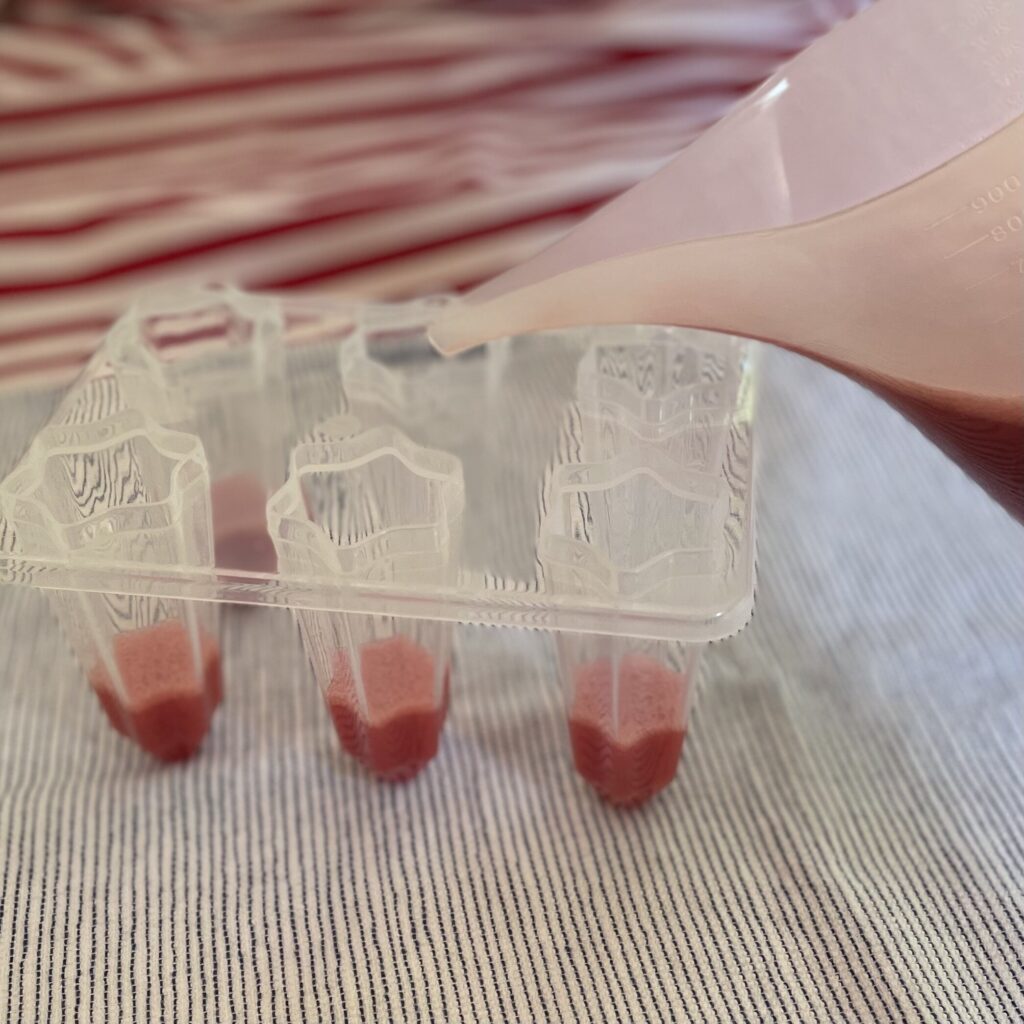
Use a funnel or spout cup to carefully pour the strawberry mixture into your popsicle molds and fill 1/3 full. Place in the freezer for 2-3 hours to set.
(I cannot stress enough how useful a spout cup is in the kitchen. I LOVE mine!!❤)
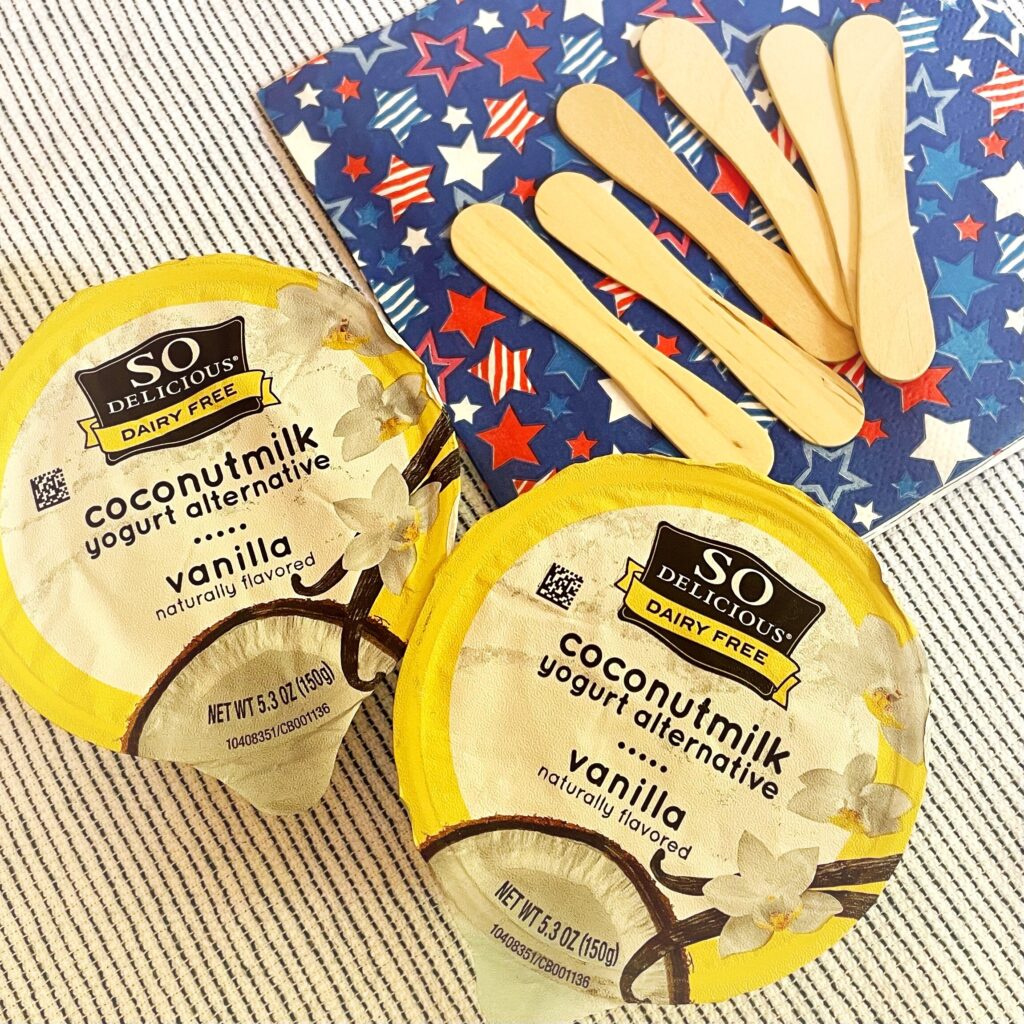
Next, is the yogurt layer. I only needed one small container, but again…it depend on YOUR size molds how much you will need.
Also gather some wooden popsicle sticks to insert during this step. (and many thanks to SO Delicious for creating a dairy-free alternative that’s absolutely DELICIOUS!)
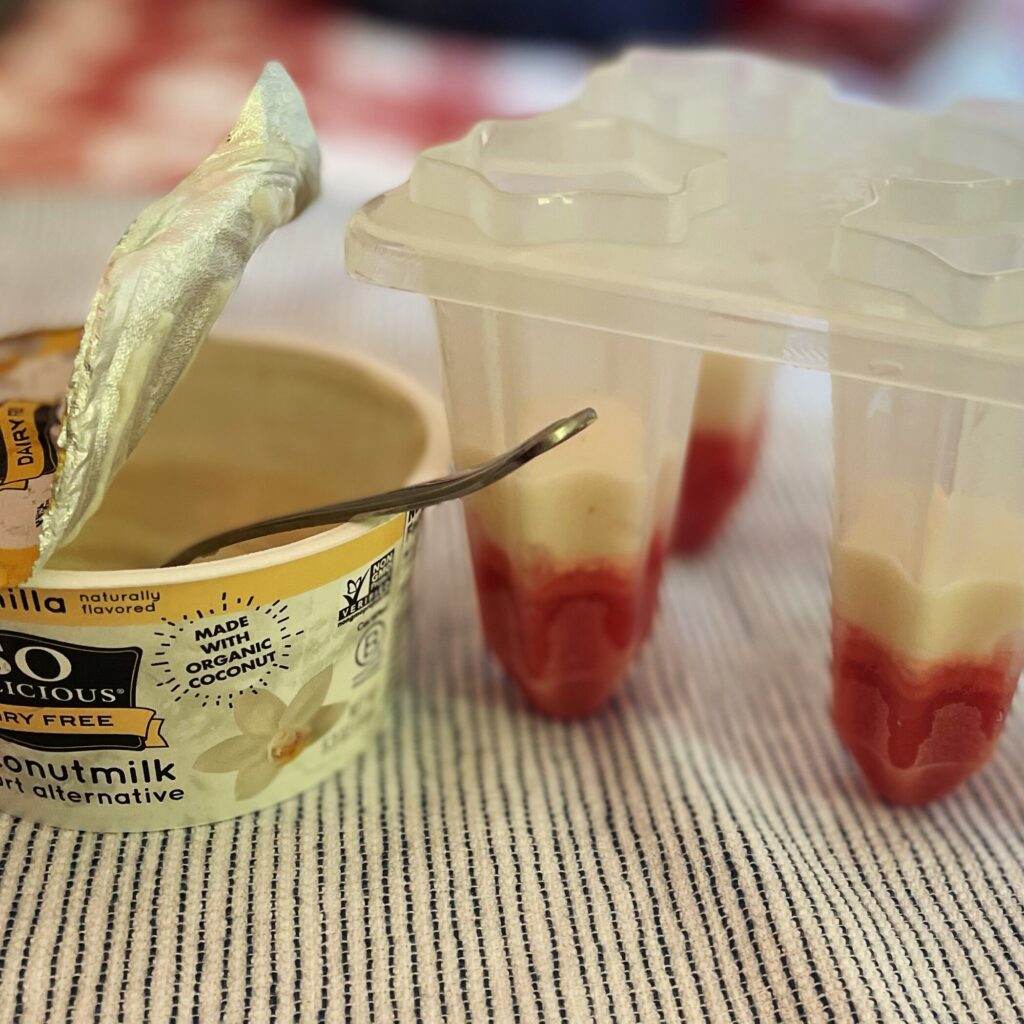
Carefully use a small spoon to scoop some yogurt into the molds on top of the frozen strawberry layer.
Add your popsicle sticks to the center of each mold. The yogurt should be stiff enough to hold stick in place. Freeze 2-3 hours.
My husband always makes fun of my “baby’ spoons in our drawer, but they come in handy sometimes and was very useful for this. I let the yogurt slide off and plop into the center, then jiggled the mold to even out. In hindsight, I should have added a tiny bit more to this layer…the yogurt layer was “SO Delicious”, just like the name suggests! 😋 Be sure to place the mold in the freezer for 2-3 hours, until yogurt layer is completely frozen.
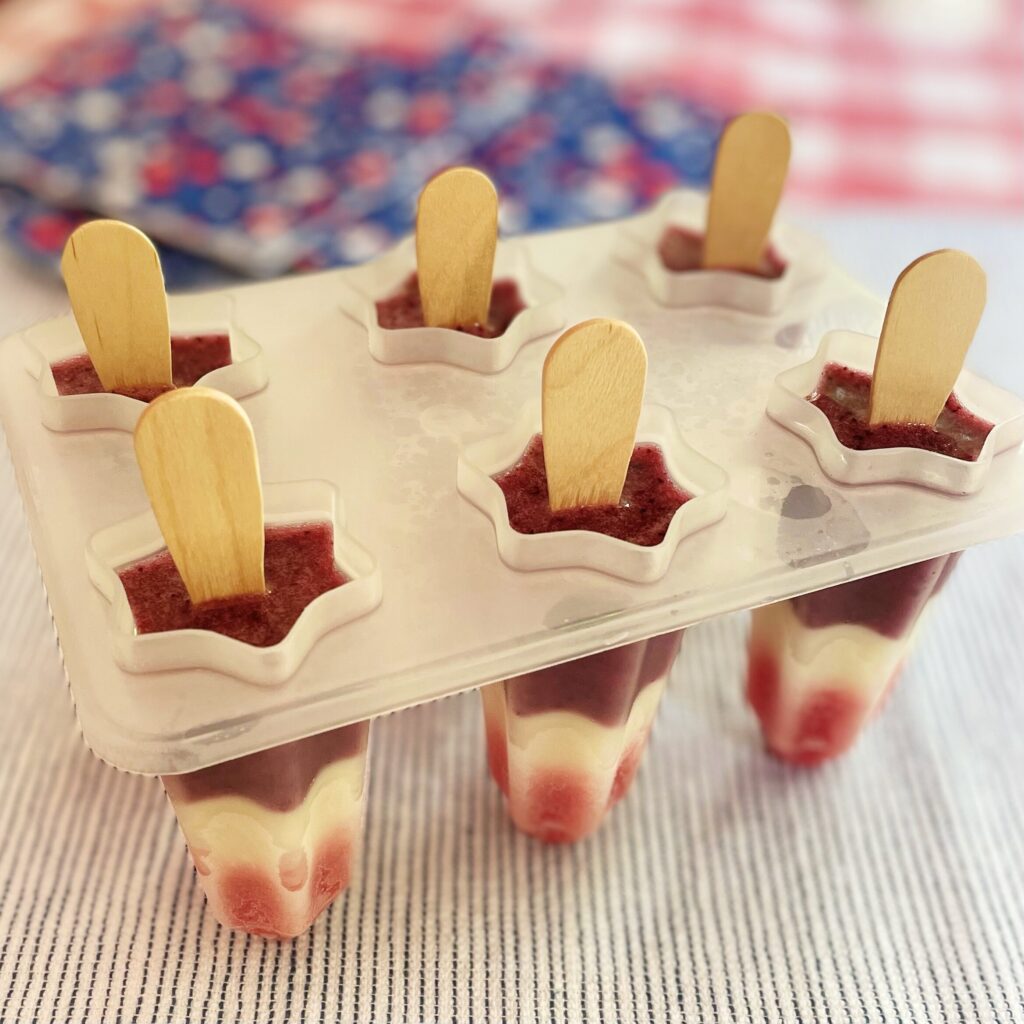
Just like the red layer, you will blend together the blueberries and the blue sports drink and carefully pour into the molds, using your spout cup or a funnel, filling almost to the top.
Freeze for 2-3 hours until completely set.
When ready to enjoy, either set out for a few minutes before unmolding, or set mold in a container filled with warm, NOT HOT, water for 15-20 seconds and they should easily unmold.


Enjoy!
💙Julie
Rocket Pops
Ingredients
- 1 cup chopped strawberries
- 1 cup red sugar-free sports drink I used Fruit Punch flavor
- Vanilla yogurt (I used a dairy-free coconut milk alternative)
- 1 cup blueberries
- 1 cup blue sugar-free sports drink I used Mixed Berry flavor
- Blender or smoothie maker
- Popsicle molds
- Popsicle sticks
Disclaimer:
Nutritional Information is provided as a courtesy only and should be viewed as an estimate. Ingredients can vary with brands and size and Inspiration Apron makes no guarantees to the accuracy of this information.
Instructions
- Gather your red ingredients together (chopped strawberries and red sports drink) and add to your smoothie or blender cup and blend until pureed into a nice smooth juice, about 1 minute.
- Use a funnel or spout cup to carefully pour the strawberry mixture into your popsicle molds and fill 1/3 full. Place in the freezer for 2-3 hours to set.
- Carefully use a small spoon to scoop some yogurt into the molds on top of the frozen strawberry layer.
- Add your popsicle sticks to the center of each mold. The yogurt should be stiff enough to hold stick in place. Freeze 2-3 hours.
- Blend together the blueberries and blue sports drink and carefully pour in the molds, filling almost to the top.
- Freeze for 2-3 hours until completely set.
- When ready to enjoy, either set out for a few minutes before unmolding, or set mold in a container filled with warm, NOT HOT, water for 15-20 seconds and they should easily unmold.